This tutorial will show you how to add a printer connected to the campus network to your Windows computer. In this tutorial we will be using the Library printer as an example, but the same procedure can be used to add most other network-attached printers.
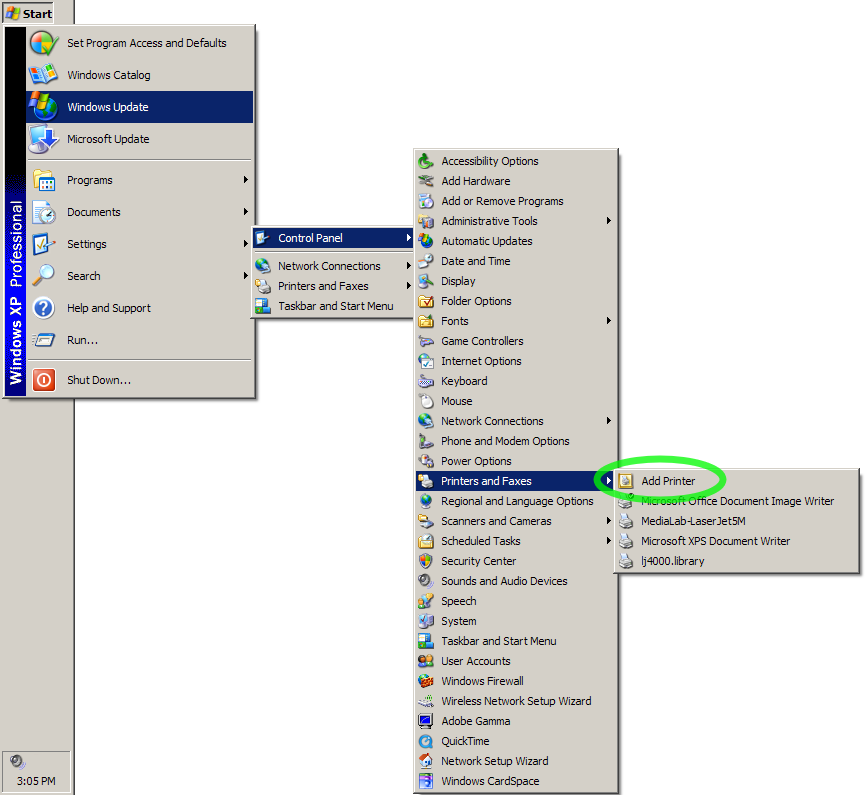
1. Choose “Add Printer” from the “Printers” section of the Control Panel.
This step may be a bit different depending on what version of Windows you are using and how it is configured. But in all versions of Windows, you need to open the Control Panel, go the Printers section, and initiate the process of adding a new printer. The picture below shows the location of the “Add Printer” function in Windows XP Professional.
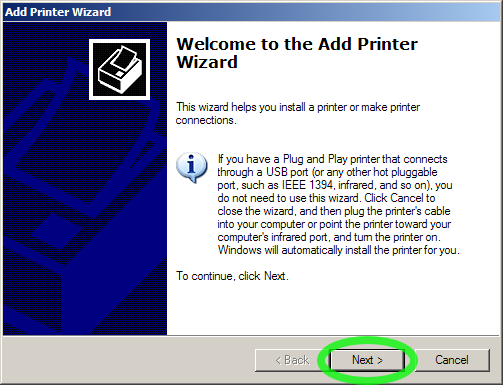
2. The “Add Printer” function is guided by a wizard. Click “Next” to continue.
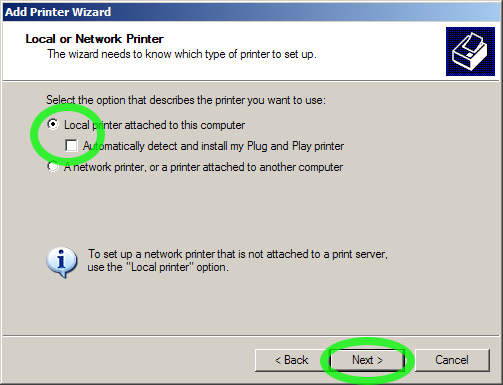
3. Choose “Local Printer” and click “Next”.
Because most network printers on the Hartland network communicate directly with your computer, rather than through a print server, choose “Local Printer” here (NOT “Network Printer”).
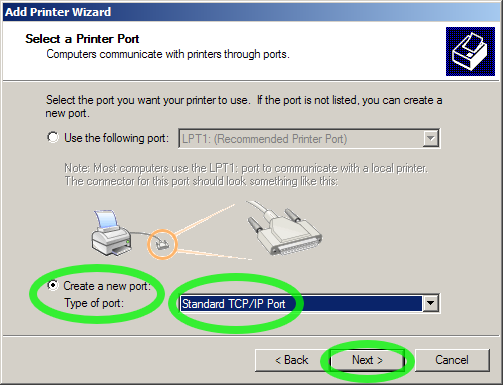
4. Choose “Create a new port” of type “TCP/IP”, and click “Next”.
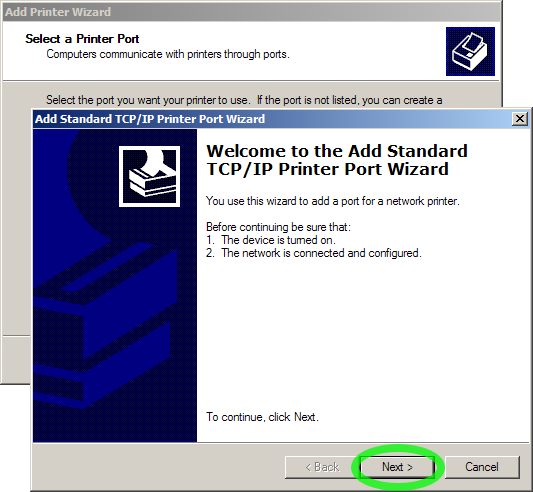
5. The “Add Port” wizard appears. Click “Next” to continue.
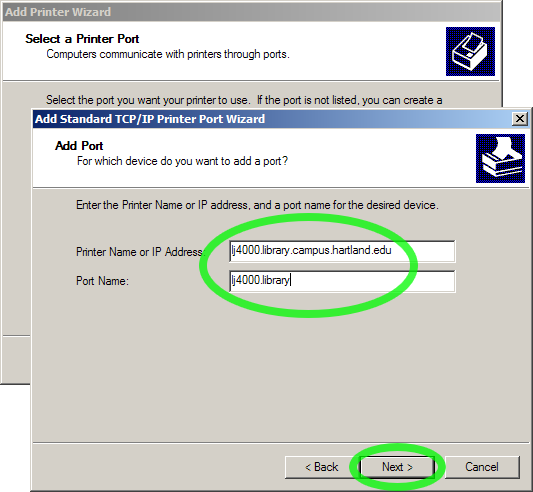
6. Enter the full network address of the printer, assign a name to the new port, and click “Next”.
You must have the full network address for the printer you are trying to use. Most printers attached to the Hartland network have a white label showing the printer’s short name, which is also the first part of the full network address. To create the full network address, add “.campus.hartland.edu” to the end of the printer’s short name shown on the label, and enter it in the box labelled “Printer Name”.
In this example, the Library printer has a label with the short name “lj4000.library” on the label. The full network address for this printer is “lj4000.library.campus.hartland.edu”.
You can just use the printer’s short name (without the “.campus.hartland.edu” at the end) for the box labelled “Port Name”.
If the printer you are trying to add does not have a label with the printer’s short name, please contact the IT Department for assistance, or use a different printer.
If the printer you are trying to use is not attached to the network with an ethernet cable, or is attached directly to another computer (e.g. with a USB cable), you cannot add the printer to your computer using this procedure.
7. Click “Finish” to close the “Add Port” wizard.

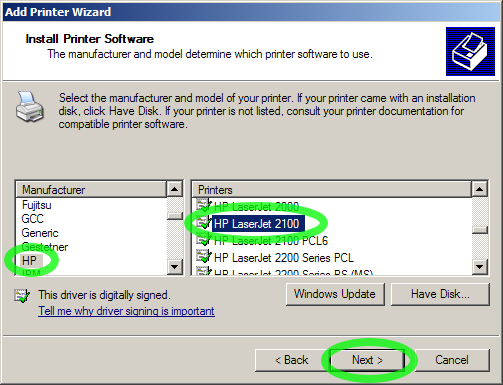
8. Choose the correct Manufacturer and Model for the printer you are adding, then click “Next”.
Drivers for most regular network printers used on campus are already included with Windows. In this example, the Library printer is an HP LaserJet 2100.
If a correct driver for the printer is not in your list, you may need to install a driver specific to the printer you are trying to use.
- Some printer drivers can be downloaded and installed through the “Windows Update” button.
- If you already downloaded the correct driver for the printer to your computer, you may be able to click “Have Disk” and browse to the location of the driver files you downloaded and extracted.
- Some printer drivers must be installed before step 1 of this procedure. Check the manufacturer’s instructions or contact the IT Department for assistance.
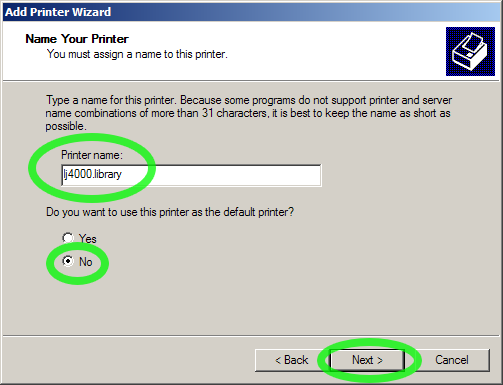
9. Enter the printer’s short name in the “Printer name” box and click “Next”.
This is the name of the printer that you will see when choosing a printer from applications like Microsoft Word. It is customary to use the name shown on the printer’s label to minimize confusion. The last part of the name usually indicates the department or location of the printer.
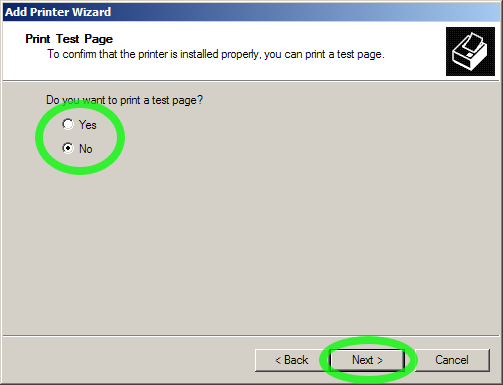
10. You may choose to print a test page if you wish, then click “Next”.
11. The printer has been added to your computer. Click “Finish” to close the wizard.
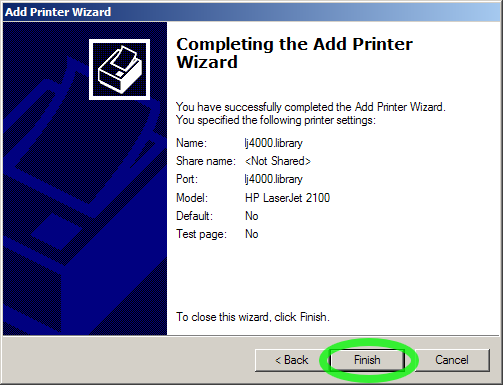
12. Done!
You should be able to print from any location on campus, as long as you are connected to the campus network over Wi-Fi or with an Ethernet cable.
Please observe proper print etiquette:
- Check the printer before you print. Make sure no one else is planning to use it and no special paper has been loaded.
- Don’t tie up the printer with long print jobs when other people may need to use it.
- Be honest and pay for your printouts or replace supplies (paper, toner, etc.) as required.
- Help keep the printer clean and well maintained. Don’t handle it roughly or abuse the machine. If there is a problem, contact the IT Department for help.