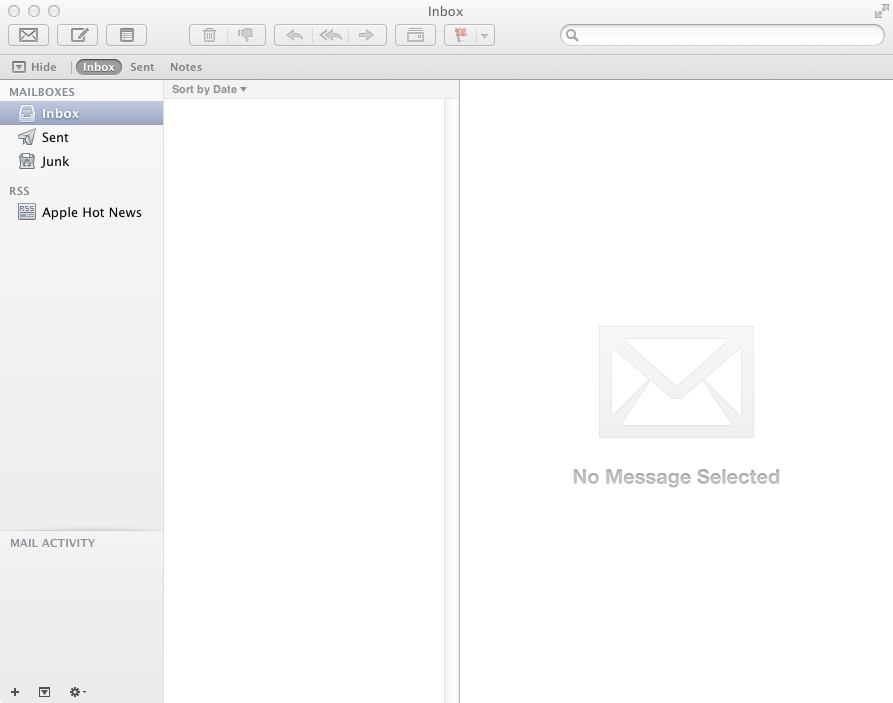
When starting the Mac OS-X Mail Client, you will see a screen something like this…
You will need to click on the "Mail" option on the menu bar, and then select "Preferences"
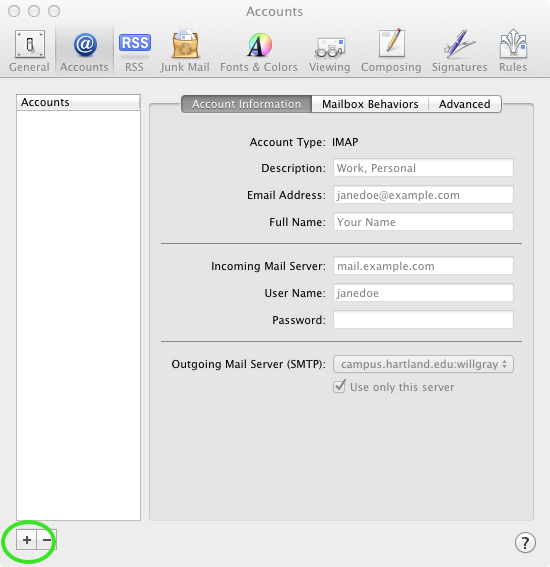
A new window will pop up and it will look like the following:
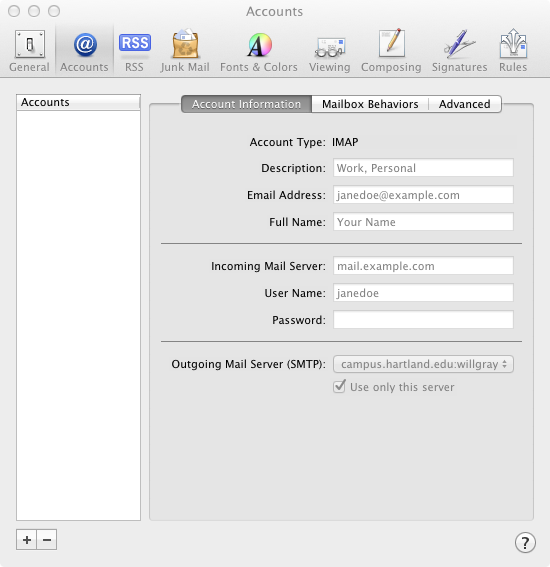
Down at the bottom of the window, you will see a "+" sign, to add an email account you click on the "+" sign.
The next window that will come up will look like the following:

You will need to fill out all of the fields in this new window.
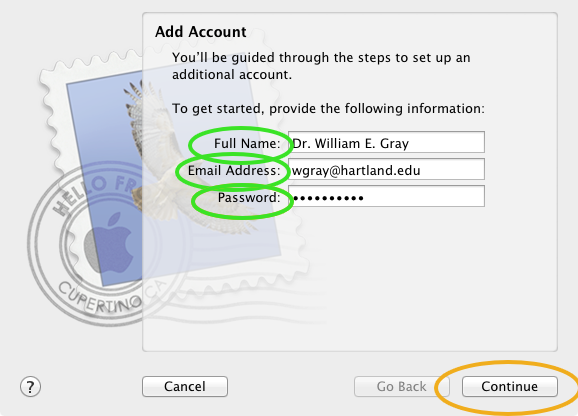
The information that you will need to enter is as follows:
- Full Name: Your Full Legal Name – "Dr. William E. Gray" (this will be the name that you want email recipients to see when they receive and email from you)
- Email Address: Your Full Email Address – "wgray@hartland.edu" (this is your full email address assigned to you by the Hartland Institute IT Department)
- Password: Your "NetAccess" password that was assigned to you by the Hartland Institute IT Department
Once you have the information typed into the boxes correctly, Click "Continue"
You may or may not see the following window pop up. If you do, just click on "Connect" to continue setting up your email account. Do not worry about this error/warning as it is an IT Department internal error and will not have any effect on your email access.

The next window to pop up will look like the following:
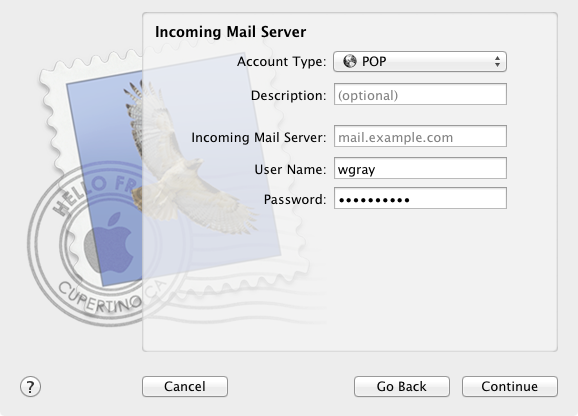
We will need to modify the information in this window as it is currently either not correct or not complete.
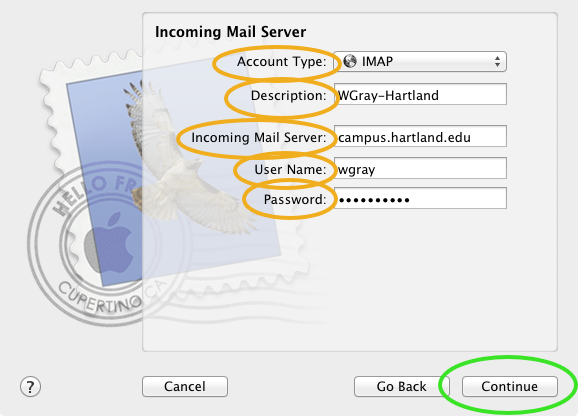
- Click on the drop down box that currently says "POP" and select "IMAP"
- In the Description box, put something that will tell you that you are looking at your "Hartland Institute" email account. As an example — "WGray – Hartland"
- Incoming Mail Server: campus.hartland.edu
- User Name: This box should be already filled out… Just verify that your username is correct.
- Password: This box should be already filled out…
Once the information is entered correctly, Click on the "Continue" button
The next window that will pop up will ask you about your "Outgoing Mail Server". This window will look like this:
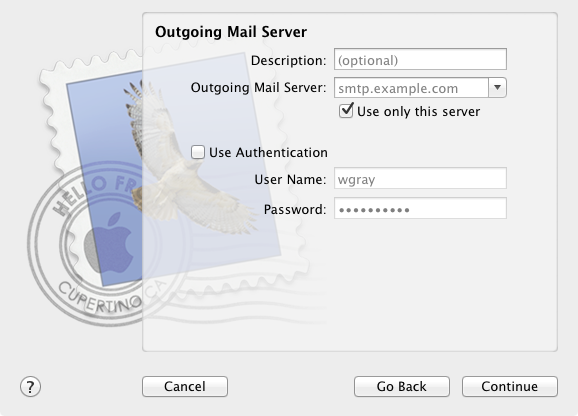
Fill out the boxes accordingly:
- Description: put something that will tell you that you are looking at your "Hartland Institute" email account. As an example — "WGray – Hartland-Outgoing"
- Outgoing Mail Server: campus.hartland.edu
- Make sure that the box labeled "Use only this server" and the box labeled "Use Authentication" are both checked.
- User Name: This box should be already filled out… Just verify that your username is correct.
- Password: This box should be already filled out…
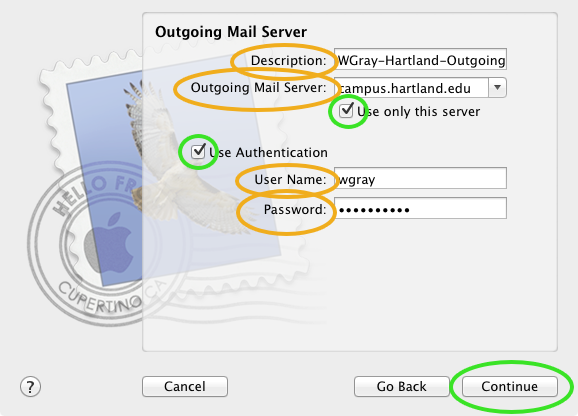
Once the information is entered correctly, Click on the "Continue" button
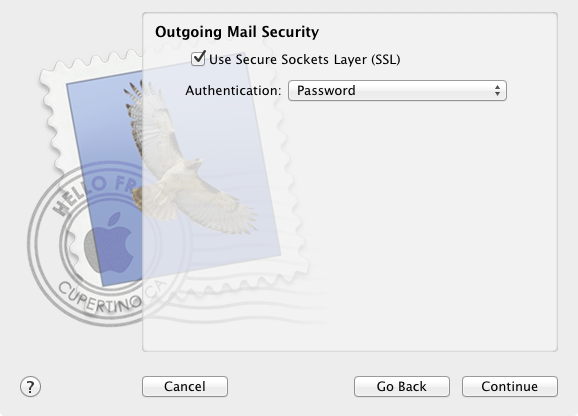
The next window that will pop up will look like the following:
Click on the check-box labeled "Use Secure Socket Layer (SSL)" to turn on this option.
Click on the drop down box that says "Password" and select "MD5 Challenge-Repsonse"
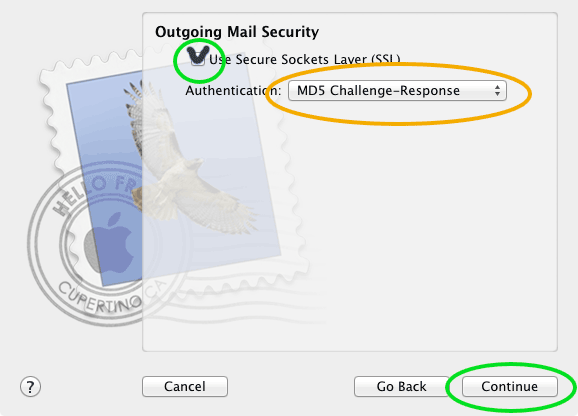
Once this is completed, Click on the "Continue" button
The following screen will look like this:
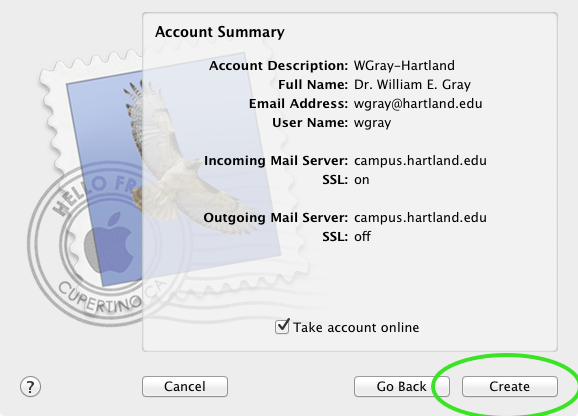
All you need to do is click on "Continue"
You will now be back at the "Preferences" screen.
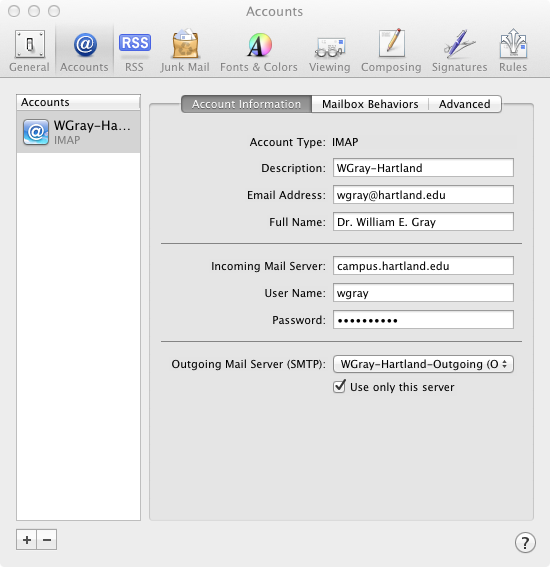
Just close this screen and you are ready to go with your email account from Hartland Institute!!! ENJOY